

Yesterday, I worked on a star field Photoshop tutorial, and it turned out pretty good. Today, we’re going to try to create a planet together that we’ll be able to toss into our star field when we’re done. I should mention straight away that any of these steps (and same goes for yesterday’s tutorial) aren’t strict rules. You can change whatever you see fit once you get the hang of these Photoshop tools and techniques. So with that, here’s my Photoshop Planet Tutorial!
To start off, we need to find a high quality texture to use for our planet. Originally I planned on going outside and finding my own texture, but that just didn’t happen. Using Google image search is a lot more simple, less time consuming, and you’ll definitely be able to find something to use that is at a very high quality. Here’s the texture I’ll be starting with today. It’s not in a style that I’ve used before, and honestly you can absolutely use whatever texture you think would work well for you, but this image stood out to me and I think I can do something pretty cool with it. (NOTE: When searching or creating your texture, it’s a lot easier to work with a large image than a small one.)
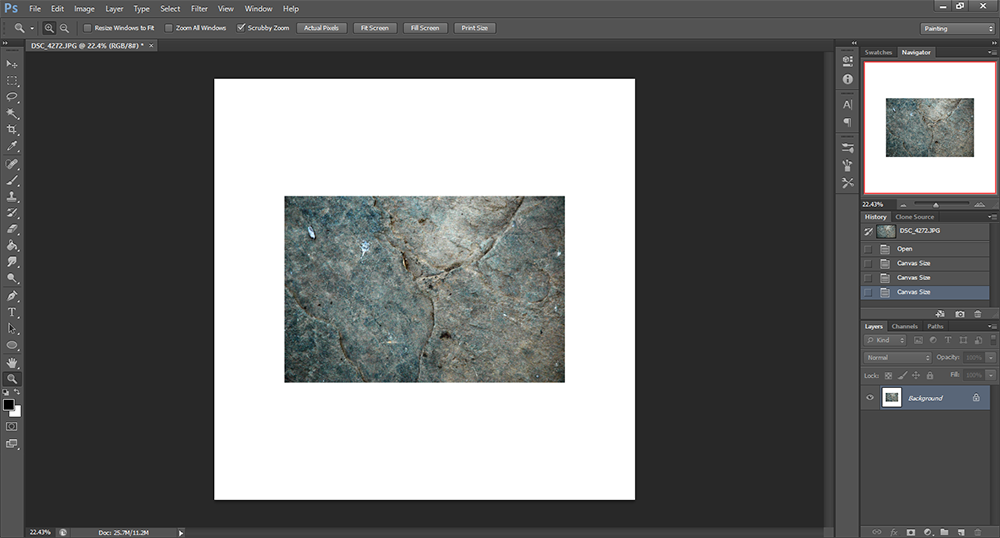
Panel 1
Alright, so once you have your texture selected, go ahead and open it up in Photoshop. Go up to Image in the top menu, then choose Canvas Size. Make sure you select Pixels in the drop down menu, and then type in 3000 for both options to make it a 3000 x 3000 canvas. You can go larger if you have a really massive texture, or go smaller if you chose a smaller one. I like working with really big images because the more pixels there are, the more details there can be.
Now, depending on the size of the texture image you’re using, you might have something that looks like what I have in Panel 1. If what you’re using fills the white box completely, then you don’t need to use this next step. If you’re have something similar to what I have though, then you’re going to need to use the Clone Tool to fill in that white space.
The Clone Tool is located on your tool bar on the left side of your screen. Once selected, you use the Alt key to target an area of your document to clone. Then when you paint on the document, you’ll be cloning directly from the area you selected. You’ll need to continue selecting new areas to clone as you go along. You want to try and have your planet texture look as natural and realistic as possible. So take your time and do your best! It’ll make a huge difference when you see what we’re going to do with it.
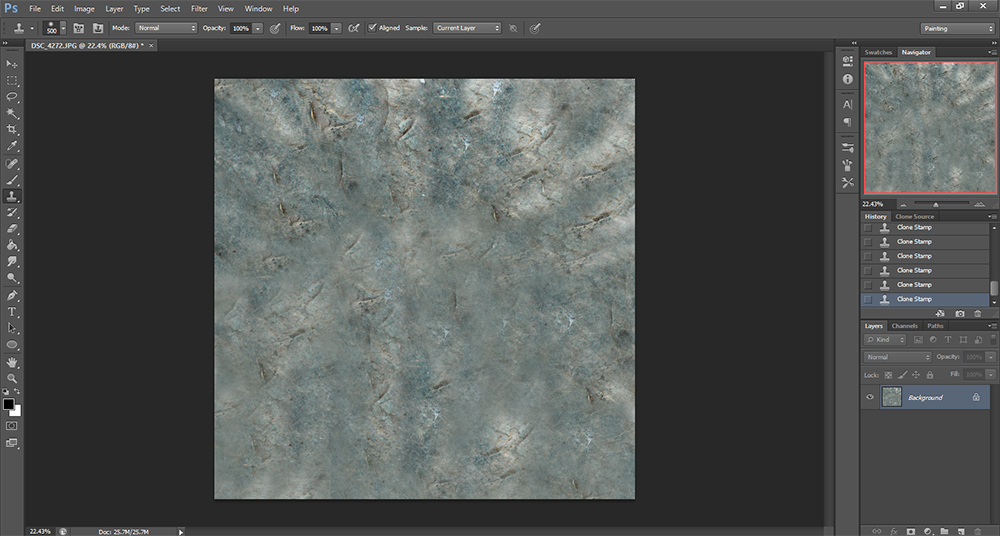
Panel 2
When you’re finished, you should hopefully have something similar to what I have in Panel 2. If not, just do your best to make sure there isn’t any white space, and that you try to keep some of the original textures present. Don’t paint over them if possible. No matter what you end up with though, you should be able to use it for a planet texture just fine.
Once you’re finished, you can go up to Edit on the top menu and choose Define Pattern. I’m gonna go ahead and name my texture, “Sammy” for today. I guess that’s going to be the name of my planet. I’ve done so many of these I can’t just name it “Planet Texture” at this point.
Go ahead and open up a new document. You can try any size document really, but remember that bigger is always better. Just as long as your particular machine can handle it. The document I just made is 3000 x 3000 pixels.
On a fresh layer (the piece of paper looking thing in the bottom right of the screen will help you create a new layer, if you need to) select the Elliptical Marquee Tool on the tool bar on the left, and while holding down the shift key, create a nice big circle. That’s going to be your planet in a second.
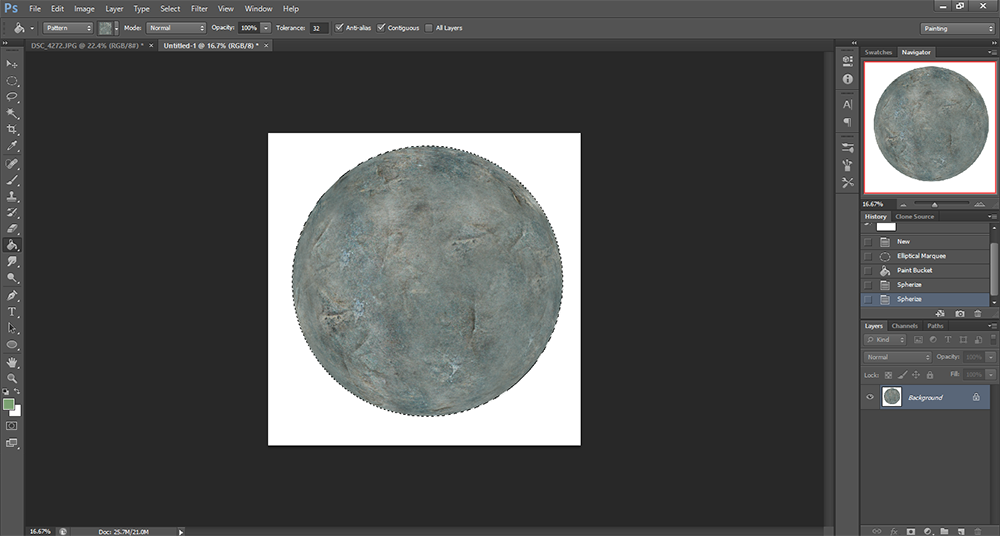
Panel 3
Now go ahead and select the Paint Bucket Tool from the tool bar, and right at the top of the screen where it says “Foreground”, change that to Pattern so we can use our texture that we made. To the right of where it now says “Pattern”, you’ll see a little box with a texture in there. Click that and select your texture. Now you can fill your circle with your glorious planet texture.
Straight after that you can go up to Filters in the top menu, then select Distort, followed by Spherize. Leave the “mode” on normal, and change the “Amount” to 100%. Then repeat these steps and Spherize once again with the same values.
You should notice that you’re starting to see your planet take shape. There’s still a lot more to do to get all the tiny details in there, so don’t get complacent yet. At this juncture though, this is when I notice whether I chose the right texture or not. So far, mine’s looking alright. It doesn’t quite have the details that I’m accustomed to using at this point, but we’ll continue on and see what we can do with it.
Alright, so at this point you can save your work and – while leaving this document open – go ahead and start a new document in Photoshop that’s a bit smaller than the document you were just working with. For me that was a 3000 x 3000 pixel document. So this new one I’m going to go ahead and make it 2000 x 2000. Make a new layer on this fresh document. Then by using the small circular “Fill” icon in the bottom right of the layer menu go ahead and fill the background with a Solid Color: Black. Make a new layer above the solid black fill layer.
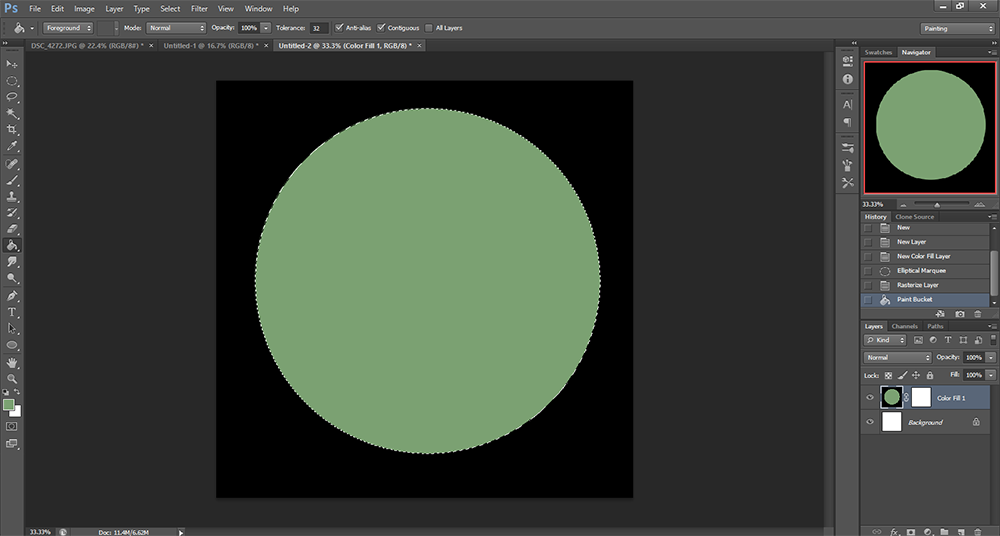
Panel 4
Using the Elliptical Tool once again, go ahead and make another perfect circle by holding down the shift key. Then using the bucket tool (and don’t forget to change the setting at the top back to Foreground from Pattern) fill in your new circle with a nice light color. I used the green you see here in Panel 4. If it asks you to rasterize your image, go ahead.
Now, by right clicking on this layer, choose duplicate. Then do that one more time so you now have two copies of your layer. Leave your original circle green, but select the first copy and using the Paint Bucket Tool go ahead and paint the circle black. Then do this again for the second copy. So now you have your original green layer (which you shouldn’t be able to see properly because the black layers are over top) and the two black copies. Yes? Excellent.
So you should go ahead and name these layers to keep things organized. The green layer (or whatever color you chose) could be named “Main”, and the one above will be “Shadow”, and the top layer should be “Atmosphere”. Speaking of which, make sure that “Atmosphere” layer’s mode is set to “Screen”. You can do this by selecting “Normal” to the left of the opacity % in the layer menu.
Now, a lot of the settings in these tutorials are subjective. You can change values and basically do whatever you want. This next section is especially true in that sense, as I tend to never use the same settings twice in a row. So just use what I’m using as a guide, and maybe change the values slightly to see what looks best for you.
Panel 5
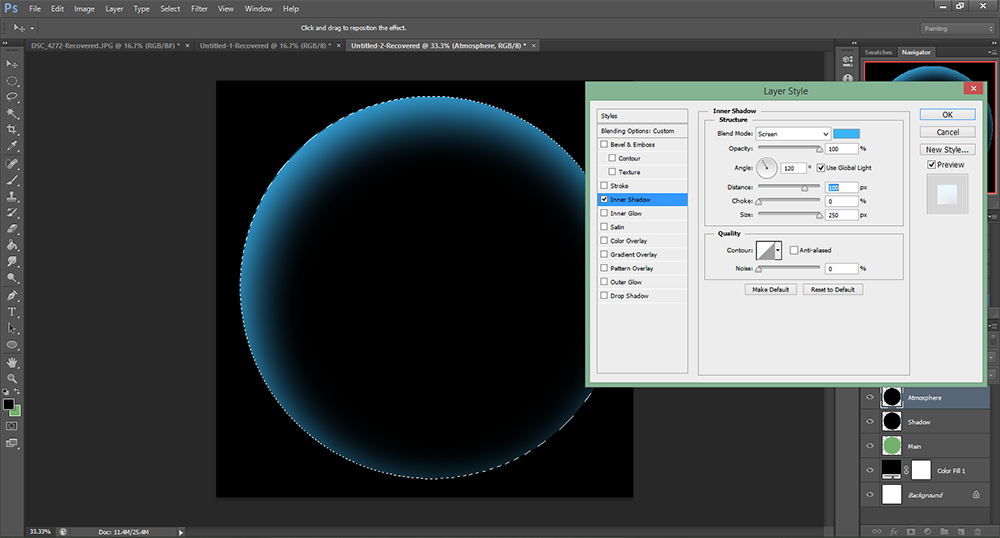
Now, while still on the “Atmosphere” layer, double click that layer (Not the word “Atmosphere” though, because that will prompt you to rename it), and you should see the Layer Styles menu pop up. Let’s build ourselves an atmosphere that glows, shall we?
Select Inner Shadow and use a Screen effect as shown in Panel 5. I’m using a nice Earth like blue color for the atmosphere today, Opacity is at 100%, Distance is at 100px, and Size I’m trying 250px.
Now, while still in the Layer Style menu, let’s jump down to Outer Glow. I made the color a really light blue for this one. Screen mode again. Opacity at 100%, and bumped up the size to 30px. You can see everything I have selected in Panel 6.

Panel 6
Let’s go right ahead and add some Inner Glow as well. Keep that Screen mode effect. Opacity 100%, and I went ahead and made sure the color is somewhere in between how bright my other two blues were. Feel free to experiment, as always! Also, change the Size is something really big. I went with 108px today. Then press OK when you’re finished.
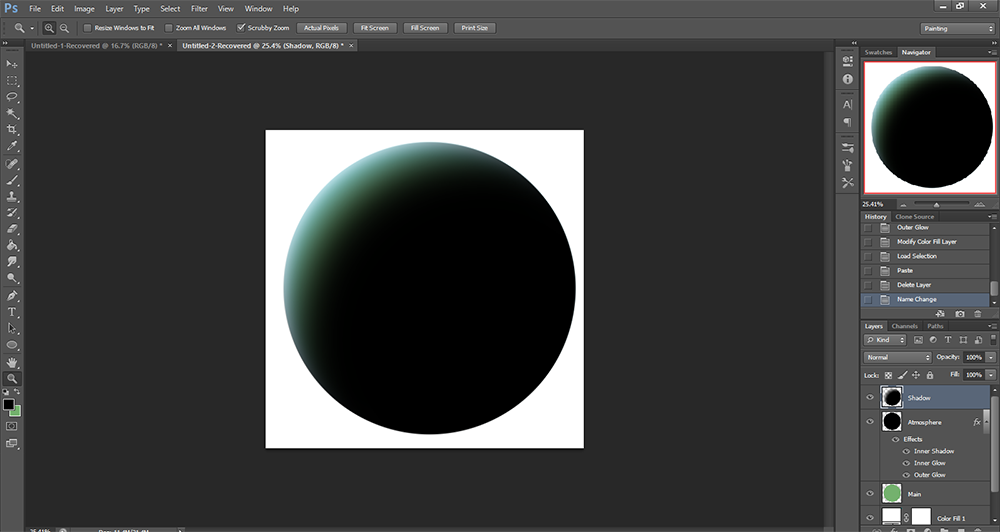
Now go ahead and click and drag your “Shadow” layer to place it above the “Atmosphere” layer. Hit ctrl + D to deselect your Marquee selection. Now, while having the Shadow layer selected, go up to Filters, Blur, and add a Gaussian Blur at 100px. Now you should have a pretty awesome looking shadow. Zoom out a bit using the Magifying Glass Tool, and let’s hit ctrl + T to transform this shadow. While holding the shift key, grab one of the corners of the transform box and carefully move it. I went with the bottom right corner and adjusted the shadow to look like what you see in Panel 7.

Panel 7
I’m just noticing it now, but the Outer Glow isn’t really substantial enough for my tastes. I’m going to go ahead and double click on “Outer Glow” under the “Atmosphere” layer, and change the Size to 48px. I think that looks a lot better, personally. Like I said, you can really change these settings to whatever you feel like to get the desired effect you’re going for. I think a tiny bit more fuzziness on the outside of the planet could look cooler. We’ll just have to see how it turns out!
One thing I like to do, though in some cases it’s not even necessary, is to go to the layer above your “Background layer” in your layer menu. It should just be the solid black color that you filled in earlier. Well, if you double click the black box in that layer, you can select a different color for your background. If you select bright white, as an example, you’ll notice that you’re shadow looks horrible. If you were to place this planet in the middle of a space scene with stars, spaceships, or perhaps a moon, then the shadow would cover those up. Now, of course, if you’re putting your new planet in the bottom right of your space scene, then the shadow won’t really get in the way. However, let’s fix this anyways okay?
Panel 8
First, make sure you’re still on that “Shadow” layer at the top there, then while holding the ctrl key go ahead and click the colored circle (mine was green, remember) to the left of your “Main” planet layer. This will select the planet shape on your canvas. Then simply press ctrl + C to copy, and then ctrl + V to paste. Then delete your “Shadow” layer. Now you can go ahead and name your new layer that you just pasted, “Shadow”.
You can change the layer second from the bottom back to solid black color by double clicking the white box in your layers menu and selecting black. When you do this, you’ll notice that the atmosphere goes all the way around your planet. That’s no good! Let’s grab the eraser tool and while on the “Atmosphere” layer, carefully erase the bits in the dark shadow area of our planet. I’m using a large fuzzy brush with 75% opacity and 100% flow. These options are on the top of the screen when the eraser is selected. I find zooming in really helps with the small details.
Okay, now it’s finally time to bring over that texture you worked so hard on earlier. You should still have that document open, right? With the circular texture still selected too. If it’s not still selected, you can use the Marquee Tool to put a selection inside your circle as close to the edges as you can. But you should still have it selected from using it before.
Now, let’s cut this texture out and place it onto our planet in the other document. Press ctrl + X to cut out the texture. Then move over to our other document with the “Shadow”, “Atmosphere”, and “Main” layers. Create a new layer (remember, that little piece of paper at the bottom there?) and make sure that new layer is right between our “Main” layer and the “Atmosphere” layer. I’m going to name mine, “Planet”. Then press ctrl + V to paste your texture. Whoa! It’s huge right? That’s okay, it’s supposed to be that way. Zoom out a bit if you have to, then press ctrl + T to transform our texture and, while holding shift to keep it’s circular shape, move the texture and shrink the texture so it fits. Make sure it’s just a tiny bit bigger so that it properly fills the planet with our texture. Then change that layer mode to “Screen”.
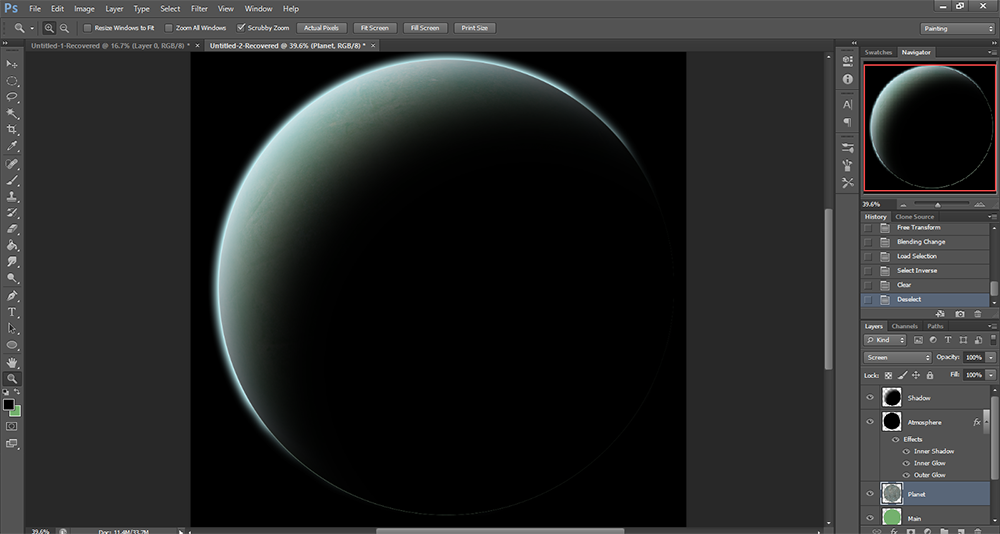
Panel 9
Now, you’re probably going to end up with that little bit of texture sticking out of the sides. That’s easy to fix, actually. ctrl + click your colored ball to the left of the “Main” layer to select it, then go up to Select in the top menu and choose Inverse. Then just hit the delete key on your keyboard. Bam! Planetness.
Okay, well if yours ended up anything like mine, it’s definitely lacking some serious texture. From here on out there isn’t really a set way to do things. Personally, I took my “Planet” layer, set the Opacity to 35% and duplicated it. Then using ctrl + T I flipped it 90°, then duplicated the layer again, and flipped it one more time.
Now, I want some of that texture to show through the shadow a bit, so I went ahead and fiddled with the “Shadow” layers Opacity a little bit. Then, while holding shift, select the top most planet copy layer, and our original “Planet” layer so that all three are selected, then right click on them and choose Link Layers, and then right click again and Merge them together. I named that layer “Planet” again, and set the mode to “Overlay”. This gives some more detail to our planet, as well as making sure our color shows through.
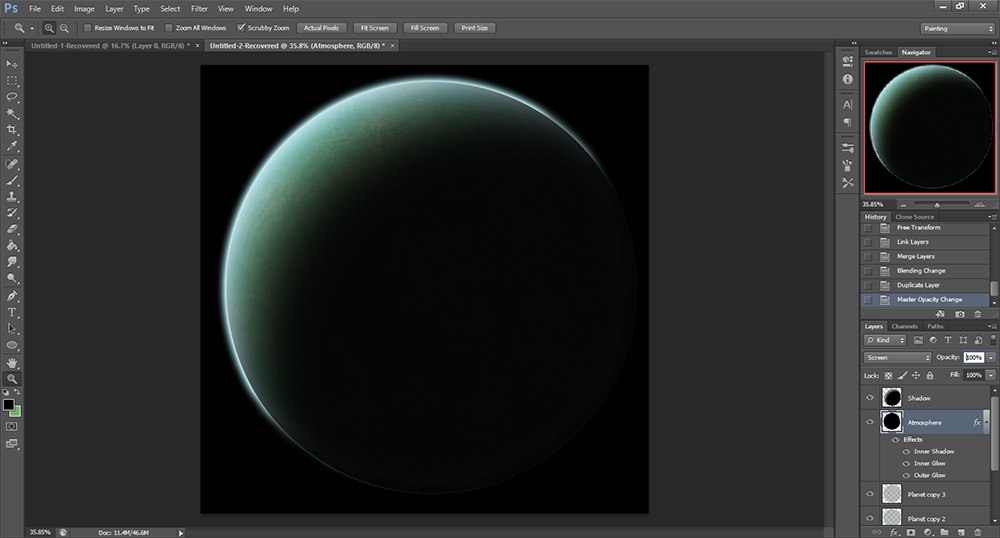
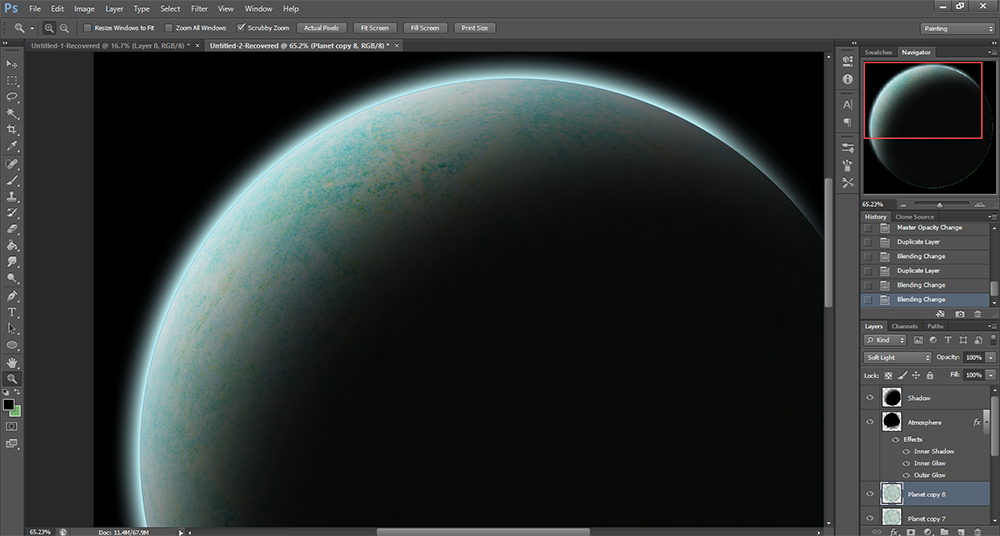
Panel 10
I continued to duplicated layers and mess around with various values and settings until I got something I liked. Here’s what I came up with in Panel 11! And also, at the top of the page is what my planet looks like when it was placed onto my star field.
Of course, at this point you could add some lens flare effects and go nuts with your favorite paint brushes to get some pretty neat effects. That’s what I’ll be doing for tomorrow! For now though, this is pretty much all I can show you on how to build some spacey-ness. I hope you enjoyed it! This took a whole lot of work and I’m not even really sure if anyone will ever try any of these techniques, let alone read this far! I put a lot of work into these tutorials so I would someone out there gets some use out of this. At the very least, I tried something new as I’ve never created a tutorial of any kind before.
Panel 11
Help support my creative habit by liking, sharing, or commenting on my posts! Visit me on the Facebooks! Or, if you like, click right here! to help support me and my creative habit financially. Any and all assistance is greatly appreciated! 🙂
